This page provides information on how to create a payment link template. When a customer clicks on this link, they will be directed to the payment page where they can transfer funds. This information is a part of the comprehensive Merchant Portal User Guide, which can be accessed here.
Payment links
You can create a template for payment links that will redirect the customer to the payment page.
Create a payment link
To create a link to a payment page, log in to your Personal Area, select the Payment links section in the left sidebar, and then click Create.
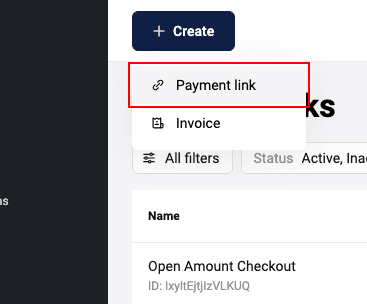
You can also create a payment link by clicking Create at the top of the page and selecting Payment link.
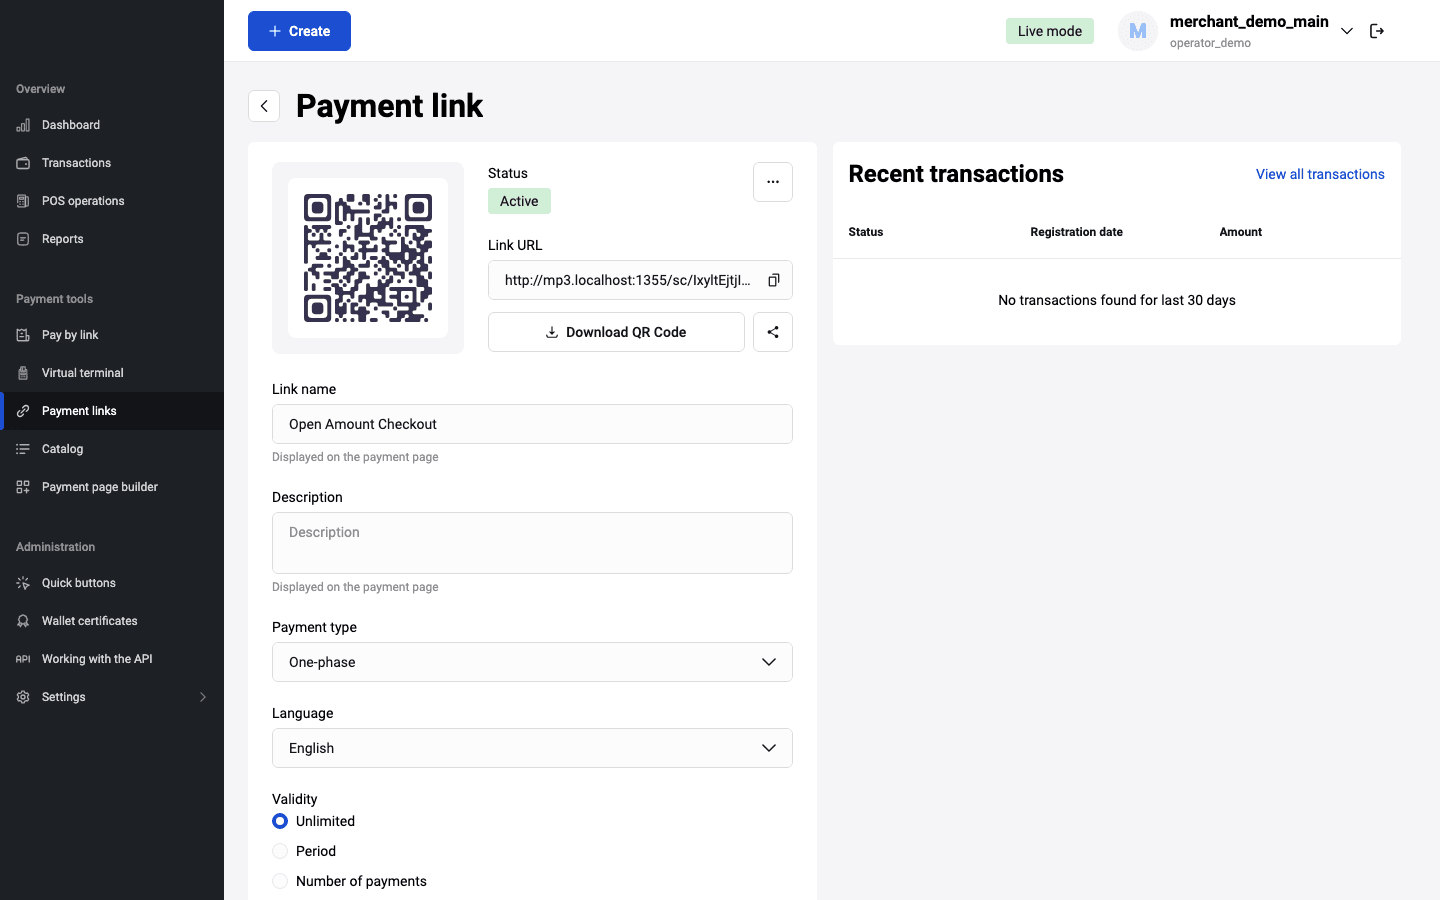
This will display a form for you to fill out:

Fill in the required fields according to the table:
| Required | Field | Description |
|---|---|---|
| Mandatory | Link name | The name of the link, which is only available to the merchant. |
| Optional | Description | Description of the order, which is only visible to the merchant. |
| Optional | Language | Language of the payment page. |
| Mandatory | Amount | The default value is "100.00". If you click on "Arbitrary", the customer can specify the amount for payment on the payment page. |
| Optional | Currency | It is set by default, the value is set according to the merchant settings. |
| Optional | Validity | The default setting is one month from the current date. You can set a different interval: to do this, click on the date and select the required start and end dates of the link from the drop-down calendar. If the Indefinite field is enabled, this field is not available for editing. |
| Optional | Description | Description of the order, which will be displayed to the customer on the pre-payment page. |
Fill in additional parameters if needed.
| Field | Description |
|---|---|
| Address | Whether or not to display the delivery address field on the pre-payment page. |
| Whether or not to display the field for entering the customer's e-mail on the pre-payment page. | |
| Full name | Whether or not to display the field for entering the customer's name and surname on the pre-payment page. |
| Phone number | Whether or not to display the field for entering the customer's phone number on the pre-payment page. |
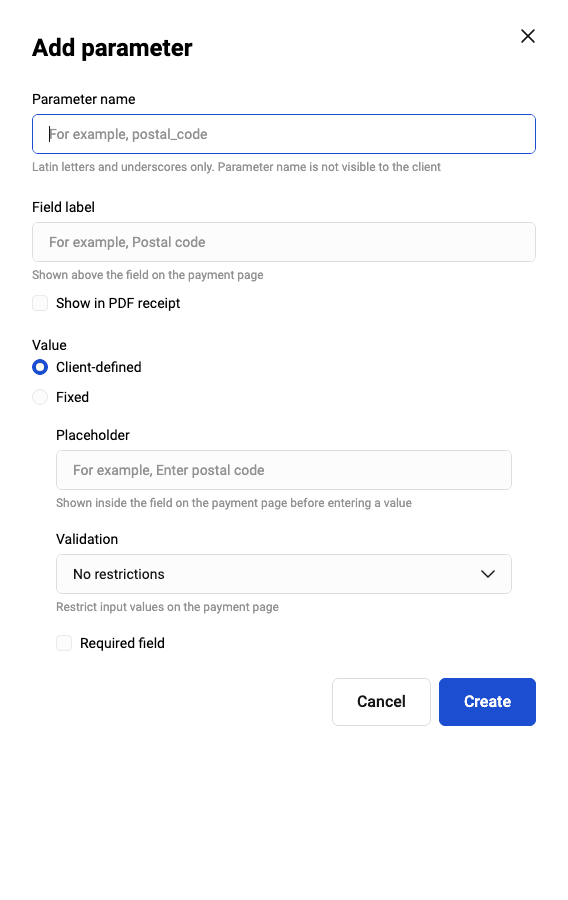
It is possible to add your own parameters. To do this, click +Add parameter and fill in the fields:
| Field | Description |
|---|---|
| Parameter name | The name of the parameter that the customer sees. |
| Field label | Required for the payment gateway. Only Latin characters and underscores are allowed. For example: size, items_count, etc. |
| Show in PDF receipt | A checkbox to be checked if the new parameter should be displayed in PDF receipt. |
| Value | Pre-filled data in the field. If you select Client-defined, specify the text to be shown inside the field in the Placeholder field, and select restrictions for the value in the Validation field (no restrictions, digits only, or a regular expression). If you select Fixed, specify the value, and the customer will not be able to change the value. |
| Required field | A checkbox to be checked if the new parameter is mandatory for the customer. This checkbox is available if Client-defined value is selected. |
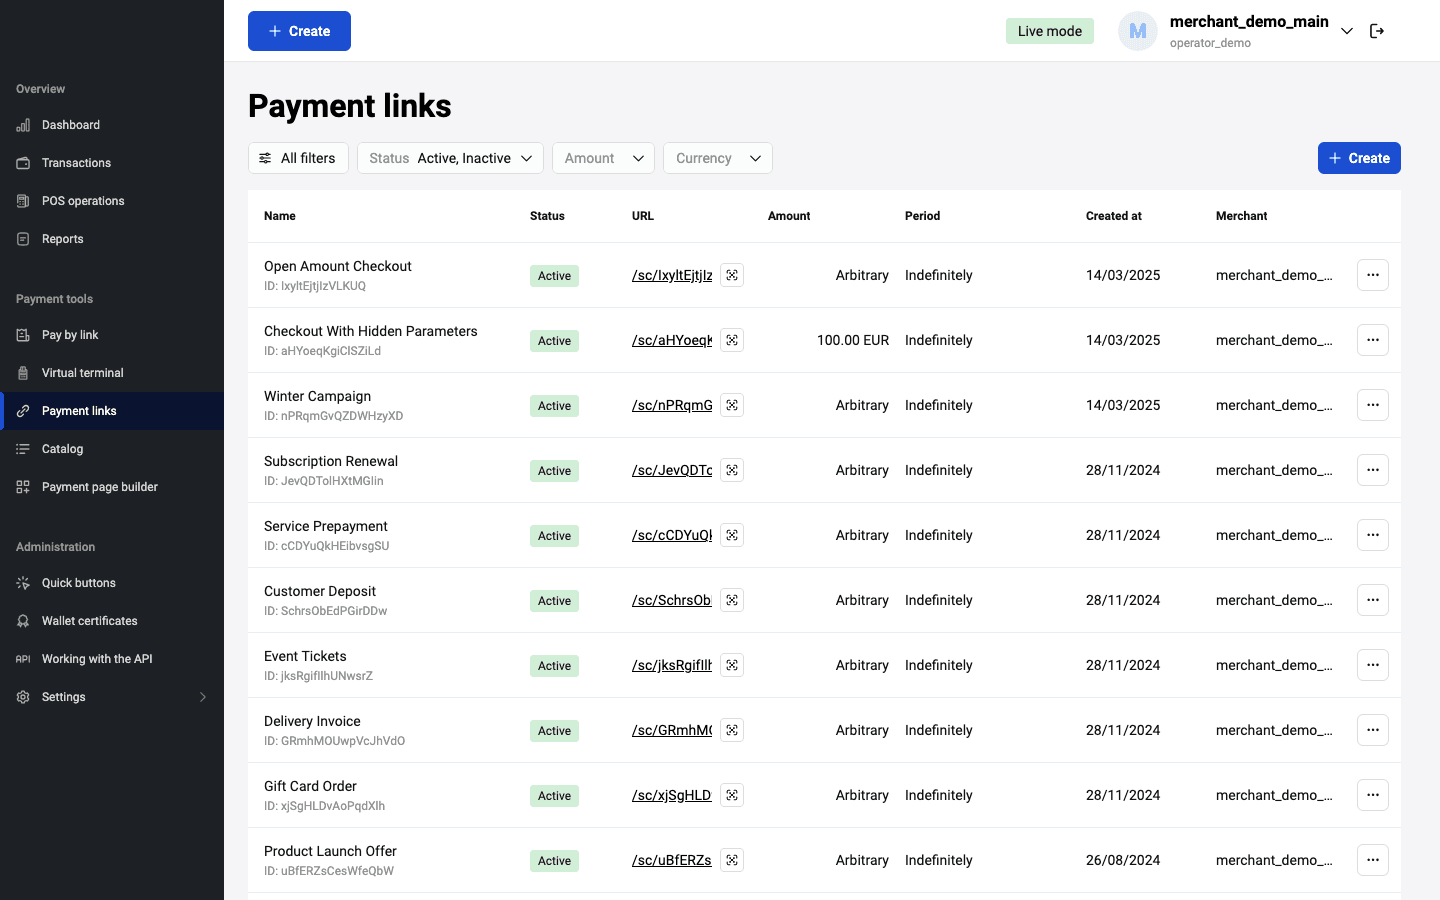
After filling in all the required fields, click Create at the bottom of the form. After that the link will be displayed on the main page with the status Active:
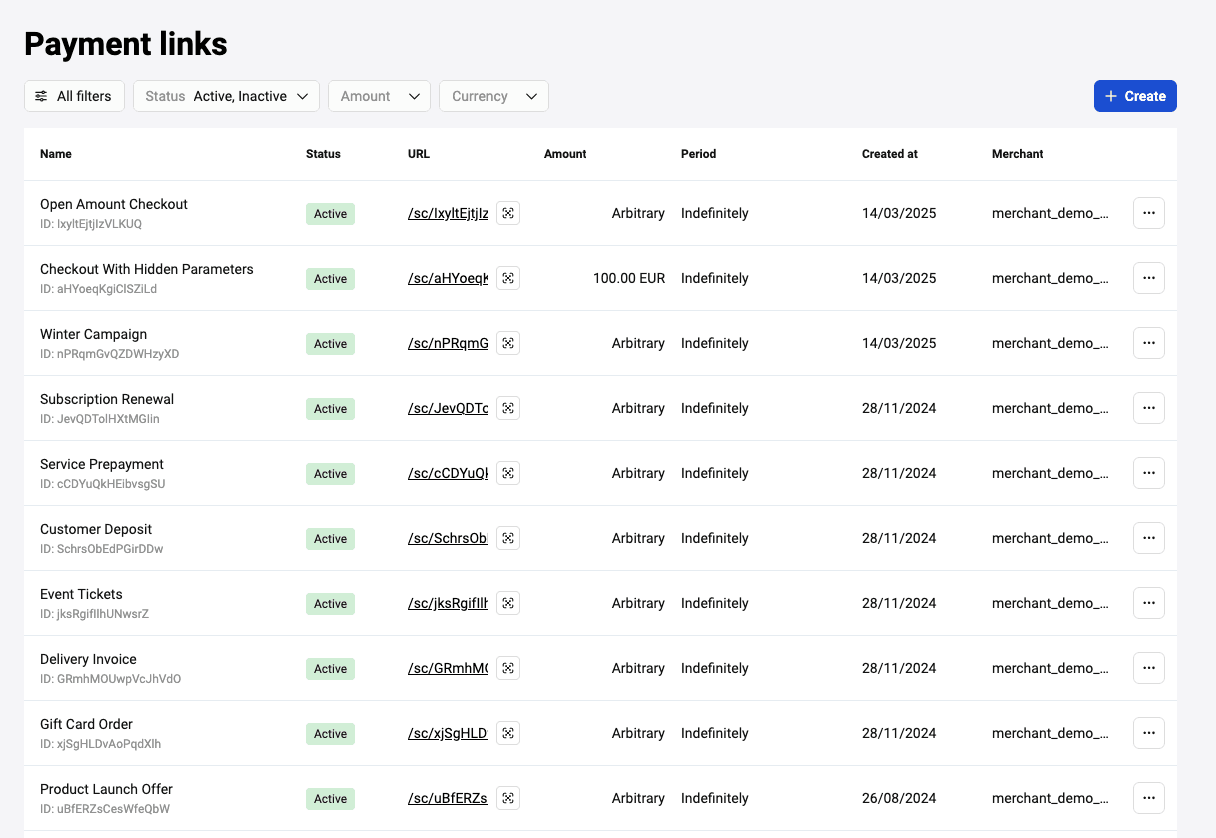
Possible actions with the payment link template
The possible actions are available by clicking on the ![]() icon.
icon.
-
Share — by clicking this button, you will be able to share a link in other applications.
- Copy link — after you click on the appropriate icon a notification appears that the link has been successfully copied.
- Download QR code — you can view the generated QR code and download it one of available formats (PNG/SVG/JPEG).
Additionally you can do the following:
-
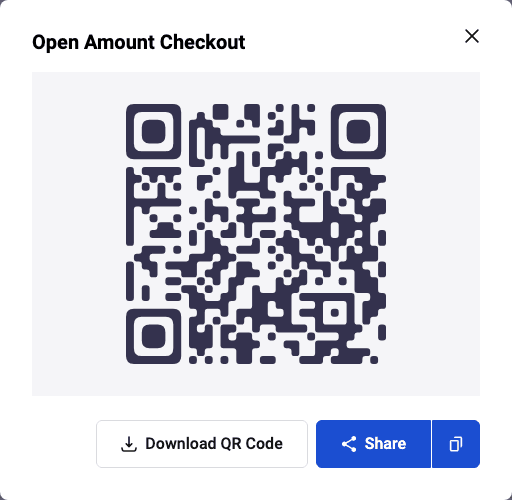
Activate/deactivate or delete link — click the icon with three dots in the link bar.
Edit link — Click the link to view or edit its details. In addition, all the actions described above are available when viewing the template link. To perform the necessary actions, click the button with the same name as the action.
-
Filter — to form a different sample of payment links, select other filters on the Payment link page. To add more filters, click More filters button. The page for selecting filters will open:
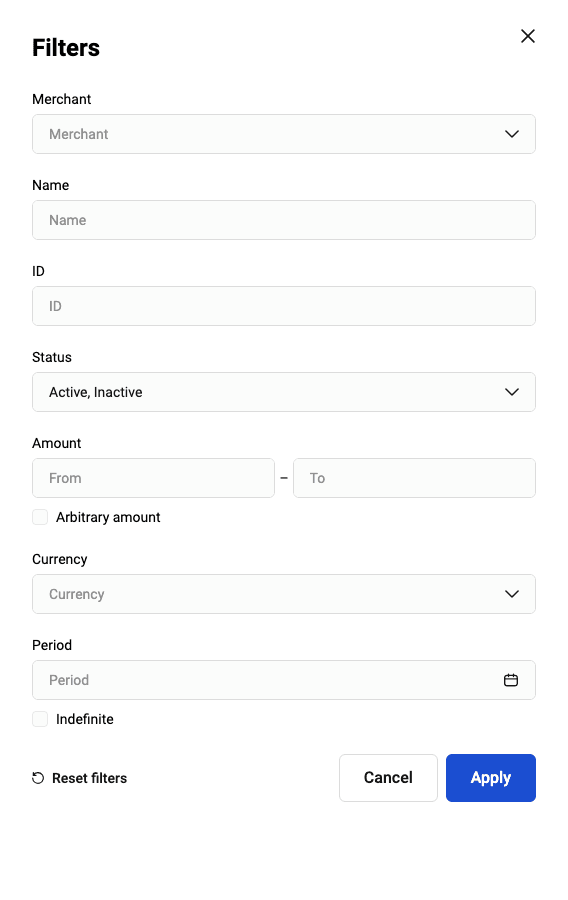
Select the required search criteria and click Apply in the filter window. To clear all filter fields, click the Reset filters button.
You can search by the following parameters:
- Merchant — If necessary, select the merchant from the list of available merchants whose payment links are to be sampled.
- Name — name of the link you set during link's creation.
- ID — identifier of the payment link template.
- Status — three link statuses are possible: Active/Inactive/Deleted. Note that deleted links are not displayed in the table unless the Deleted status is explicitly selected in the filter.
- Amount from - Amount to — Order amount (these fields are not editable if the Arbitrary amount option is activated).
- Arbitrary amount — activate the option if the amount as a search criterion is not important.
- Currency — choose a currency from the dropdown list.
- Period — the validity period set for the link. Click on the dates and select the start date and the expiration date in the calendar (the field is not editable if the Indefinite option is activated).
- Indefinite — activate the option if the validity period of the link as a search criterion is not important.
Pre-payment/Payment page
If additional parameters were specified while creating the link (E-mail/Full name/Phone/Address) or the payment amount field was left blank, the client should fill in the required field(s) on the prepayment page when opening the generated payment link and only then proceed to the payment of the order. An example of the pre-payment page with an additional parameter:
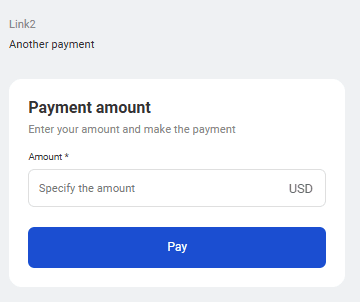
An example of a pre-payment page with an order amount without additional parameters:
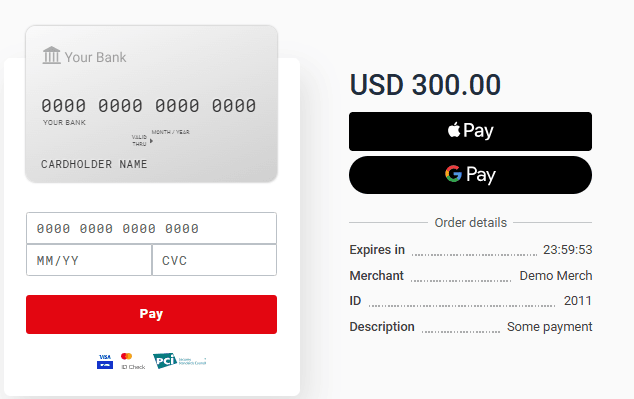
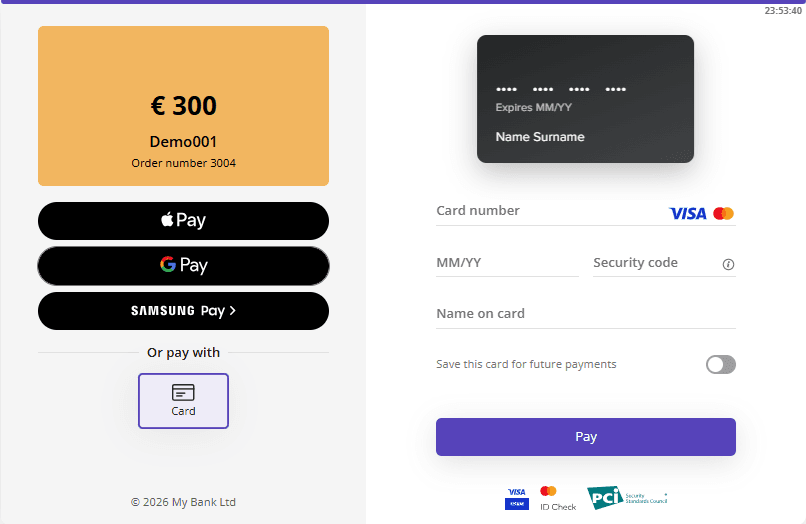
An example of a payment page: